ArangoDB v3.11 reached End of Life (EOL) and is no longer supported.
This documentation is outdated. Please see the most recent stable version.
Single Sign-On (SSO) in ArangoGraph
ArangoGraph supports Single Sign-On (SSO) authentication using Security Assertion Markup language 2.0 (SAML 2.0)
About SAML 2.0
The Security Assertion Markup language 2.0 (SAML 2.0) is an open standard created to provide cross-domain single sign-on (SSO). It allows you to authenticate in multiple web applications by using a single set of login credentials.
SAML SSO works by transferring user authentication data from the identity provider (IdP) to the service provider (SP) through an exchange of digitally signed XML documents.
IdP-initiated versus SP-initiated SSO
There are generally two methods for starting Single Sign-On:
- Identity Provider Initiated (IdP-initiated): You log into the Identity Provider and are then redirected to ArangoGraph.
- Service Provider Initiated (SP-initiated): You access the ArangoGraph site which then redirects you to the Identity Provider for authentication.
ArangoGraph only supports SP-initiated SSO because IdP-Initiated SSO is vulnerable to Man-in-the-Middle attacks. In order to initiate the SSO login process, you must start at ArangoGraph.
Configure SAML 2.0 using Okta
You can enable SSO for your ArangoGraph organization using Okta as an Identity Provider (IdP). For more information about Okta, please refer to the Okta Documentation .
Create the SAML app integration in Okta
Sign in to your Okta account and select Applications from the left sidebar menu.
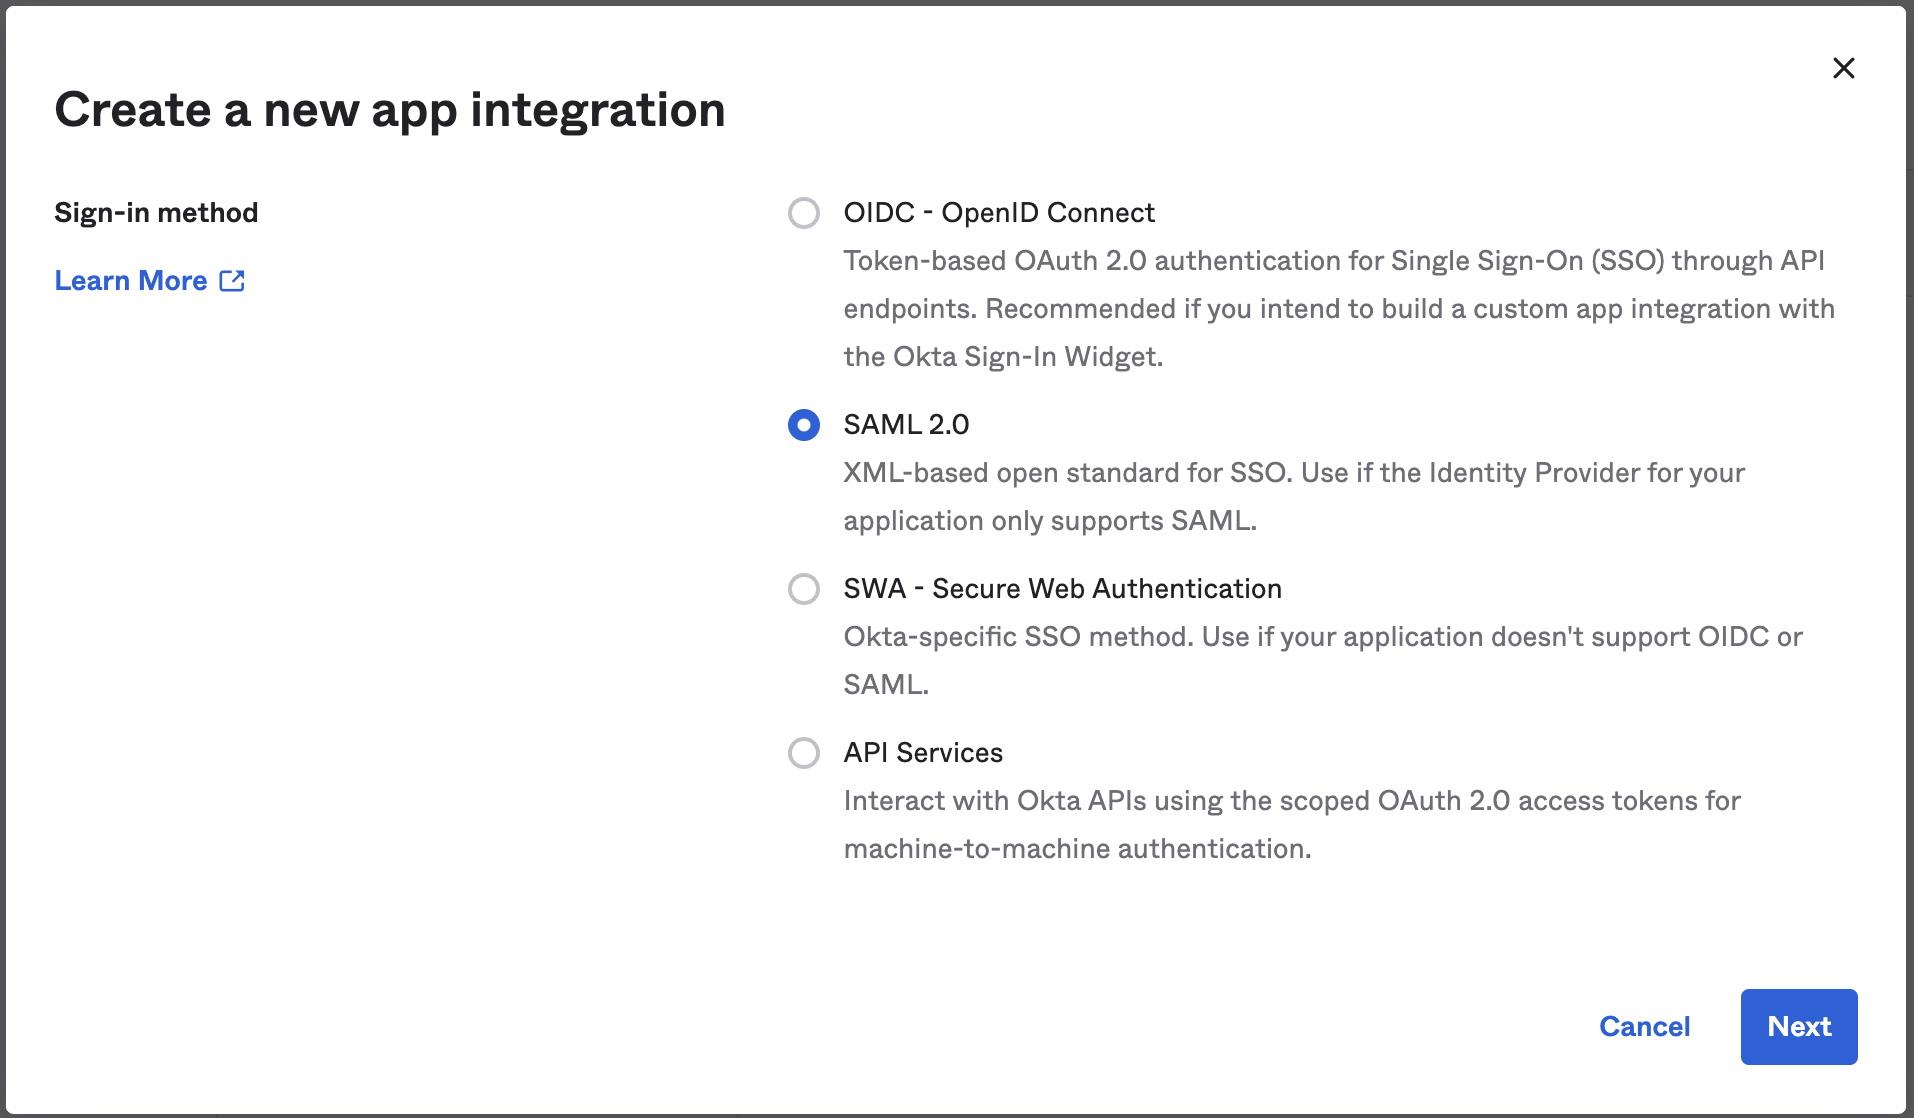
Click Create App Integration.
In the Create a new app integration dialog, select SAML 2.0.
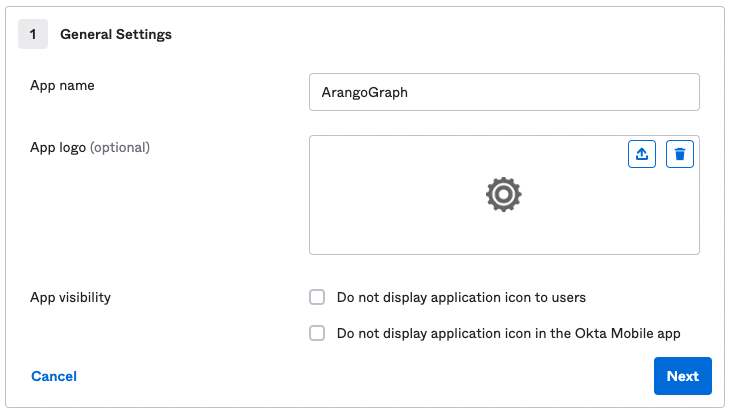
In the General Settings, specify a name for your integration and click Next.
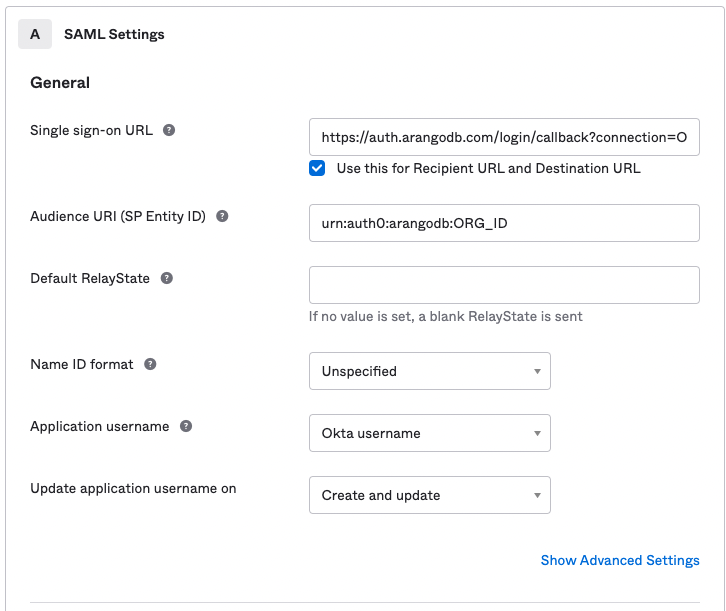
Configure the SAML settings:
- For Single sign-on URL, use
https://auth.arangodb.com/login/callback?connection=ORG_ID - For Audience URI (SP Entity ID), use
urn:auth0:arangodb:ORG_ID
- For Single sign-on URL, use
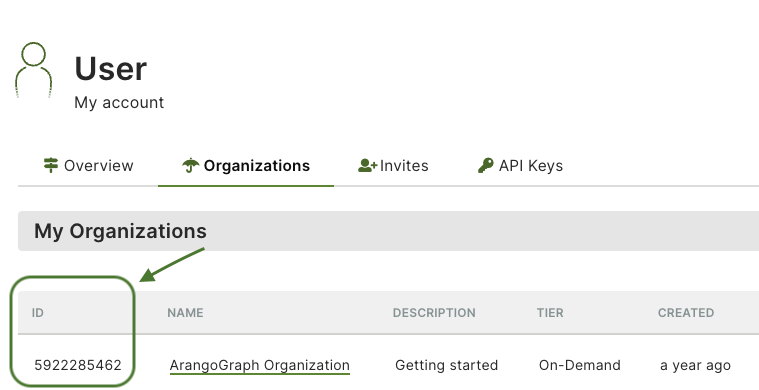
Replace ORG_ID with your organization identifier from the ArangoGraph Dashboard. To find your organization ID, go to the User Toolbar in the top right corner, which is accessible from every view of the Dashboard, and click My organizations.
If, for example, your organization ID is 14587062, here are the values you would use when configuring the SAML settings:
https://auth.arangodb.com/login/callback?connection=14587062urn:auth0:arangodb:14587062
In the Attribute Statements section, add custom attributes as seen in the image below:
- email:
user.email - given_name:
user.firstName - family_name:
user.lastName - picture:
user.profileUrl
This step consists of a mapping between the ArangoGraph attribute names and Okta attribute names. The values of these attributes are automatically filled in based on the users list that is defined in Okta.
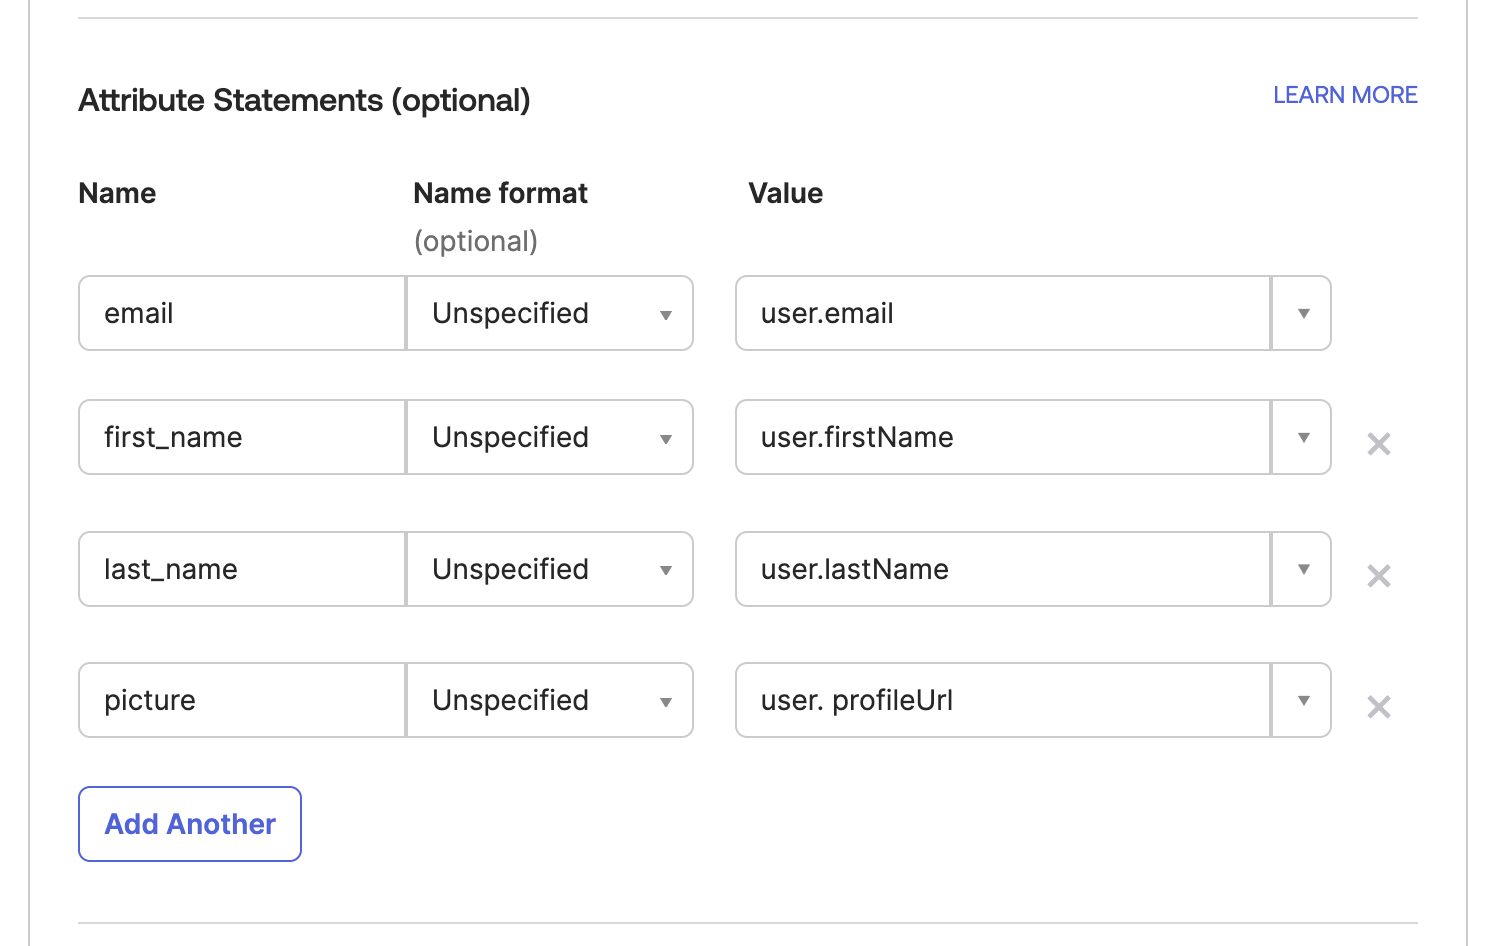
- email:
Click Next.
In the Configure feedback section, select I’m an Okta customer adding an internal app.
Click Finish. The SAML app integration is now created.
SAML Setup
After creating the app integration, you must perform the SAML setup to finalize the SSO configuration.
Go to the SAML Signing Certificates section, displayed under the Sign On tab.
Click View SAML setup instructions.

The setup instructions include the following items:
- Identity Provider Single Sign-On URL
- Identity Provider Issuer
- X.509 Certificate
Copy the IdP settings, download the certificate using the Download X.509 certificate button, and share them with the ArangoGraph team via an ArangoGraph Support Ticket in order to complete the SSO configuration.
